How to Get Rid of Shadows in Photoshop
This Photoshop tutorial shows you how you can easily remove or reduce harsh shadows from any photograph in Photoshop CC and Photoshop CS6.
Sometimes you get the perfect photo, but there are unwanted shadows on it.
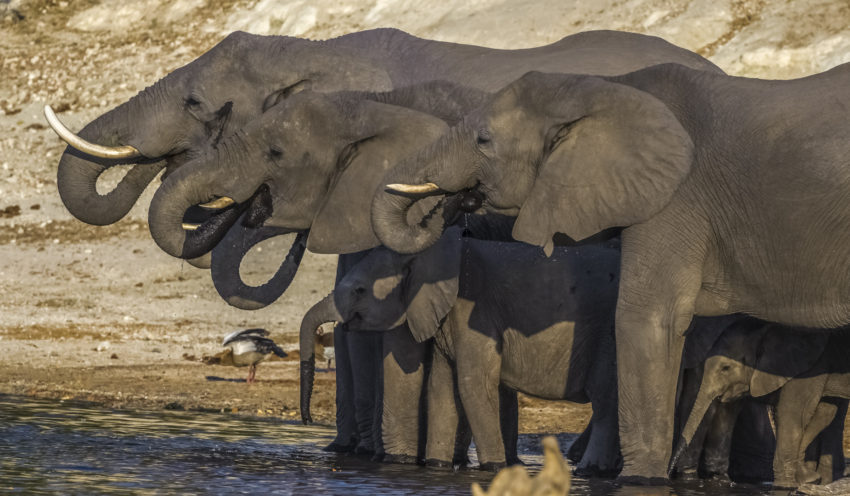
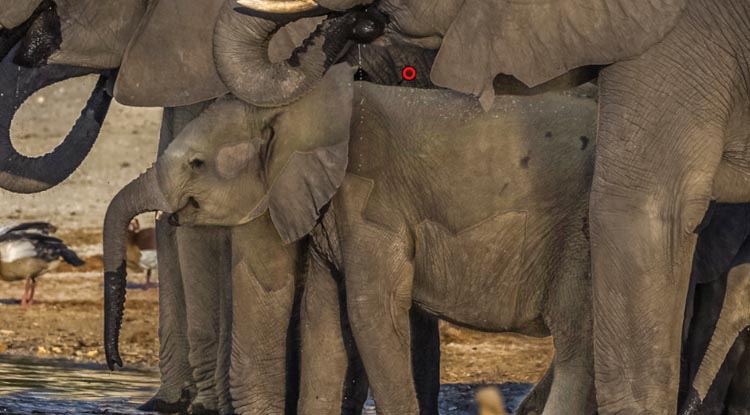
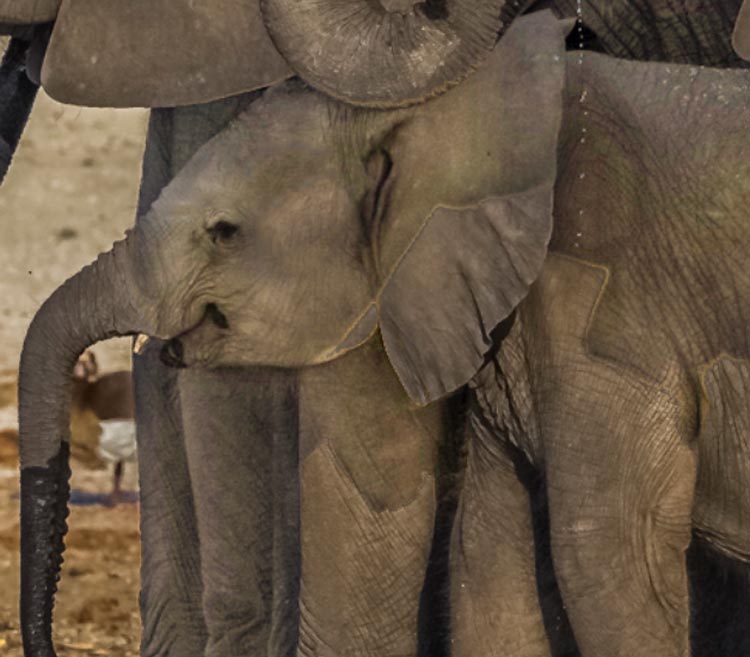
This picture was sent to me by one of our members: Richard Pilcher. He asked…
"I have a NEF file of elephants drinking – refer to attached jpeg. Is there any way to reduce the impact of harsh shadows on the baby elephants? Hopefully you can address this common issue at some stage in the future."

Fortunately, yes, we can fix this in Photoshop. Thanks for the question and sending the lovely image, Richard.
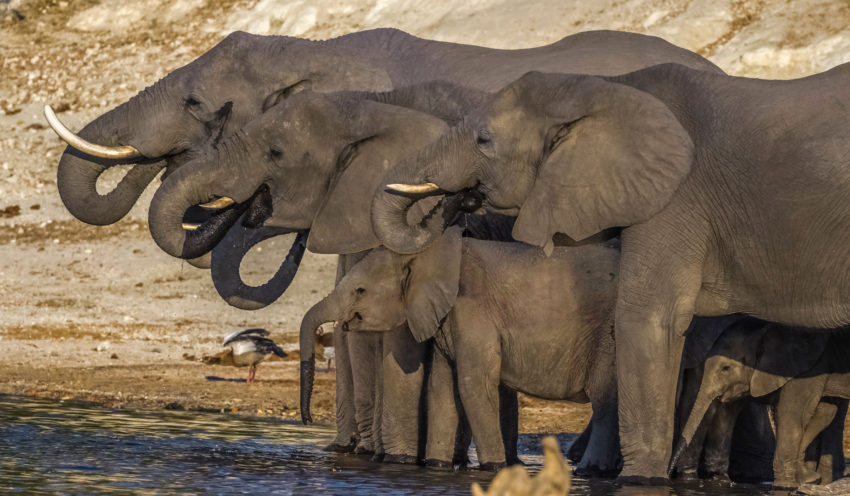
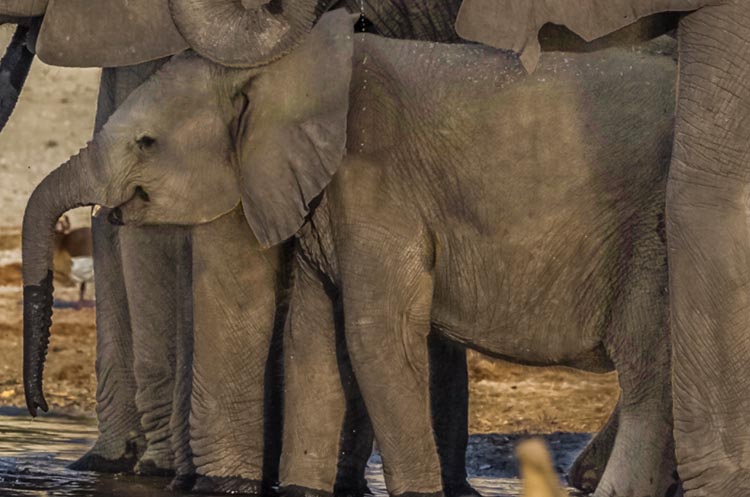
Here is my fixed image. I worked from the jpg, so if you are working from an original raw file, you should get even better results.
Ok, let me show you what I did.
Removing a Shadow from a photo in Photoshop
This tutorial is made in Photoshop CC, but it will work on Photoshop CS6 as well. Make sure to watch the quick video at the top of the page to see the tutorial that walks through this and adds a bit more information.
Lets begin with our picture of the elephants.
Step 1.
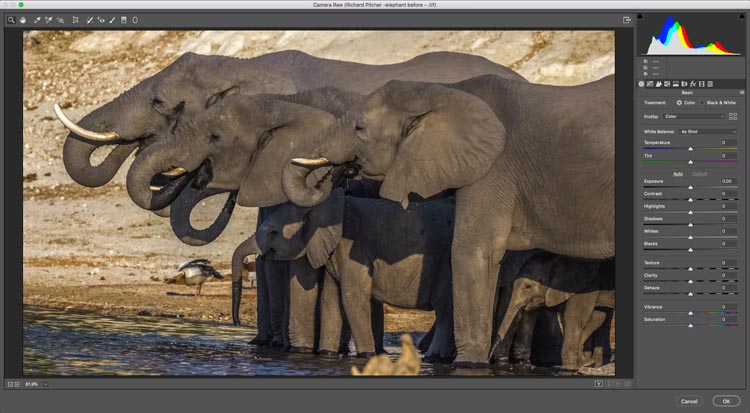
Choose Filters>Camera Raw filter (Photoshop CC)
In Photoshop CS6, open the file in Camera Raw from Bridge.
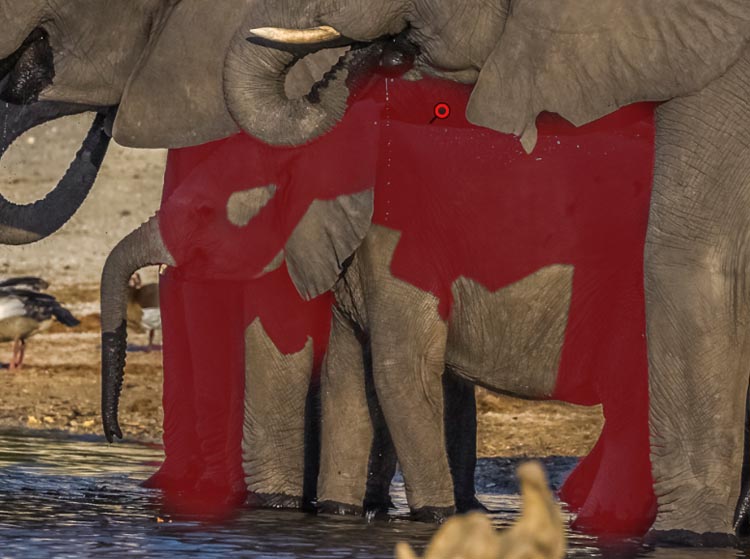
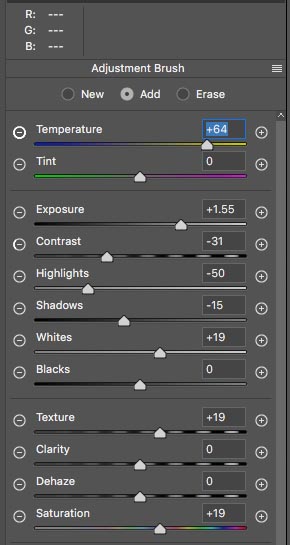
Step 2. Isolating the shadow area.
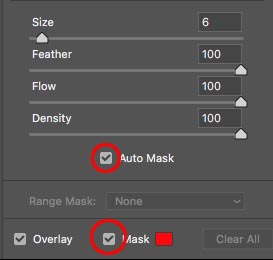
Let's select the shadow. Choose the Adjustment brush.
![]()
At the bottom of the panels, choose Auto Mask.This will detect the edges.
Turn on Mask, so you can see where you are painting.
Step 3.
Paint over the shadow area. Auto Mask will keep it inside the lines.
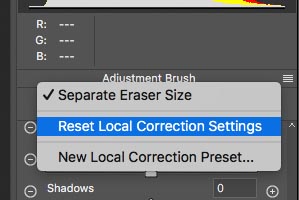
Step 4.
Turn off Mask overlay, so you can see the image.
![]()
Click on the hamburger menu, at the top of the adjustment brush panel and choose Reset Local Correction Settings. This zeros out all the adjustments.
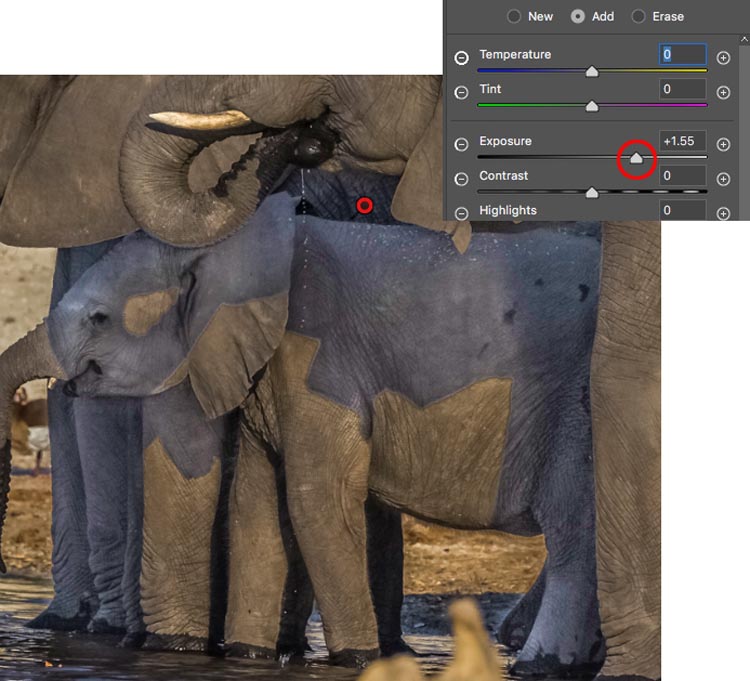
Here is the area we want to work on.

Step 5. Balancing the shadow area.
Now we want the selected area to match. There are 2 things to pay attention to. Brightness and color.
First of all, move the Exposure slider until the brightness matches the surrounding areas. (Also try the Shadow slider)
It's looking good, but notice how the color temperature in the shadows is cooler than the rest of the image.
Step 6.
Move the color temperature to the right to warm it up.
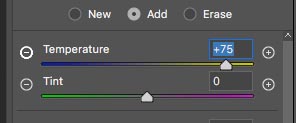
See how we have almost matched the shadow area just with exposure and temp?
Step 7.
Make more adjustments to try and get the match even better.
This is what I have come up with. The shadow areas are looking good. The image looks patchy because of the edges, we will fix that now.
Click ok to apply the ACR (Adobe Camera Raw) adjustment.

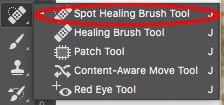
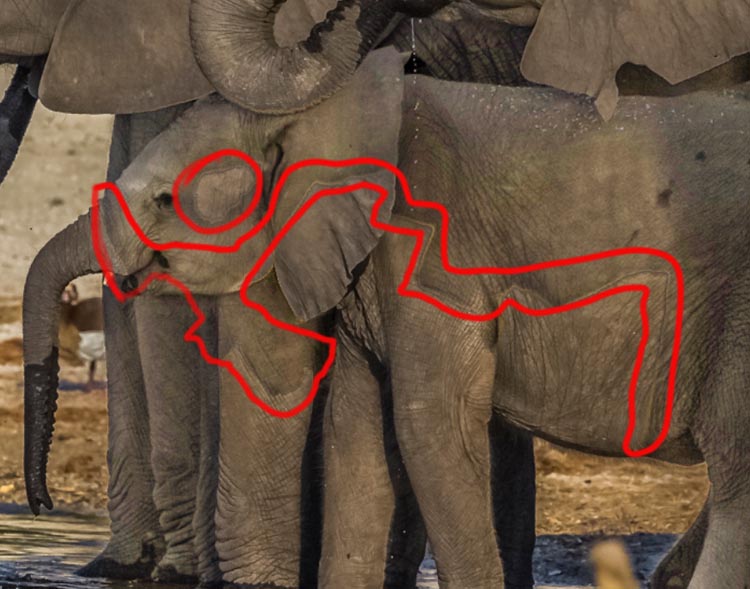
Step 8, Fixing the edges.
Choose the Spot Healing Brush.
I have highlighted the areas to fix.
Move the brush over small areas at a time.
Here is face is fixed in a few seconds.
Almost done.
And we are finished.
Compare that to the before image!
I really hope that you found this video and written steps useful and that this helps you fix distracting shadows in your photos. If it was helpful, please tell everyone about PhotoshopCAFE and share this tutorial on your social media.
Great to see you here at the CAFE
Colin
PS Don't forget to join our mailing list and follow me on Social Media>
- Youtube.
(Ive been posting some fun Instagram and Facebook Stories lately)
You can get my free Layer Blending modes ebook here
PHOTOSHOP CC SELECTION SECRETS
NEW COURSE BY COLIN SMITH
Stop struggling with selections. Learn how to select and cut out anything from people, hair, trees, complex shapes and even transparency.
Discover how to get perfect edges, without halos and jaggies. Colin shows you exactly how in 18 lessons.
All the images are included for you to follow along.
You will be able to select and cut out anything: faster and cleaner.

MORE INFO HERE
How to Get Rid of Shadows in Photoshop
Source: https://photoshopcafe.com/remove-shadows-photoshop-photoshop/